If you know me personally or are simply a reader of this
blog you should have come to the conclusion that I love pork in pretty much all
forms. Over half of the cooking related posts here either have a pork product
as an ingredient or are the primary focus of the dish. The pig is natures
miracle beast and I dig it - Pulled Pork, Cured Hams, Charcuterie, Pork
Sausage, Pork Ribs, Roast Pork, Pork Chops, Pork Loin, Bacon, oh my! - I love it
all.
My absolute favorite is Kalua Pig. The Hawaiian method of
cooking a whole pig in an Imu (pit in the ground) and over the years I’ve cooked
a dozen or so by this method and if I can dredge up any decent photos I may do
a post on that someday. But for this post, we’re talking about a different
method.
Last weekend we cooked one of the dinners for an annual club
event. We considered an Imu for Kalua Pig, but the location didn’t suit it so I
decided to try something new and chose to cook the pig in a La Caja China. If you
are unfamiliar with the device it is a metal lined plywood box with a tray on
top that holds charcoal. The pigs (or other meats) are roasted inside the box
by means of radiated heat from the coals above.

It’s a highly counter intuitive cooking method in that the
overwhelming majority of the heat from the coals just rises away from the top
of the box however enough is radiated down through the steel tray to get the
job done. Apparently the Grandfather (a Cuban immigrant) of the gentleman that
owns the company saw a similar device being used by Chinese railroad workers in
Cuba
and further developed the method and productized it for sale here. American
Dream right?
So the process begins with the procurement of a whole hog. For
this size group I purchased an animal that was 100lbs on the hoof, which worked
out to be about 80lbs after slaughter and would yield roughly 40-50lbs of meat.
Plenty for a crowd of 70 wherein a few of the big fella’s will eat ~1lb, most
everyone will eat 1/2lb or less and we had about 10 vegetarians in the group
(not sure who invited them). I purchased the pig from Joe Alves of Bar None
Ranch in Half Moon Bay, CA (650)726-7977. I’ve bought from him
before. The service is great and prices are beyond fair. When I arrived to pick
up the pig it had already been slaughtered and had been under refrigeration for
over 12hrs to ensure it was good and chilled before they handed it off to me
for transport. When I told them how I was cooking the pig they butterflied it
on the spot in seconds. A process that would have taken me…..well, far longer.
The day before cooking the pig I injected it with a Cuban Mojo
sauce (recipe below) in multiple places in the hams, backstraps, loins and
between each rib. Then I rubbed the pig both inside and out with the solids
from the sauce mixed with salt & pepper and kept it on ice until the next
day.
On the day of the cook I removed the pig from the ice and
left it out (covered) to bring the pig up to room temperature before commencing
the cook.
The La Caja China website has a number of videos and written
instructions on the process, and it ships with a set of written instructions
and just in case you are a complete dolt and either don’t recall or forgot to
bring the instructions, they are printed on the side of the box.

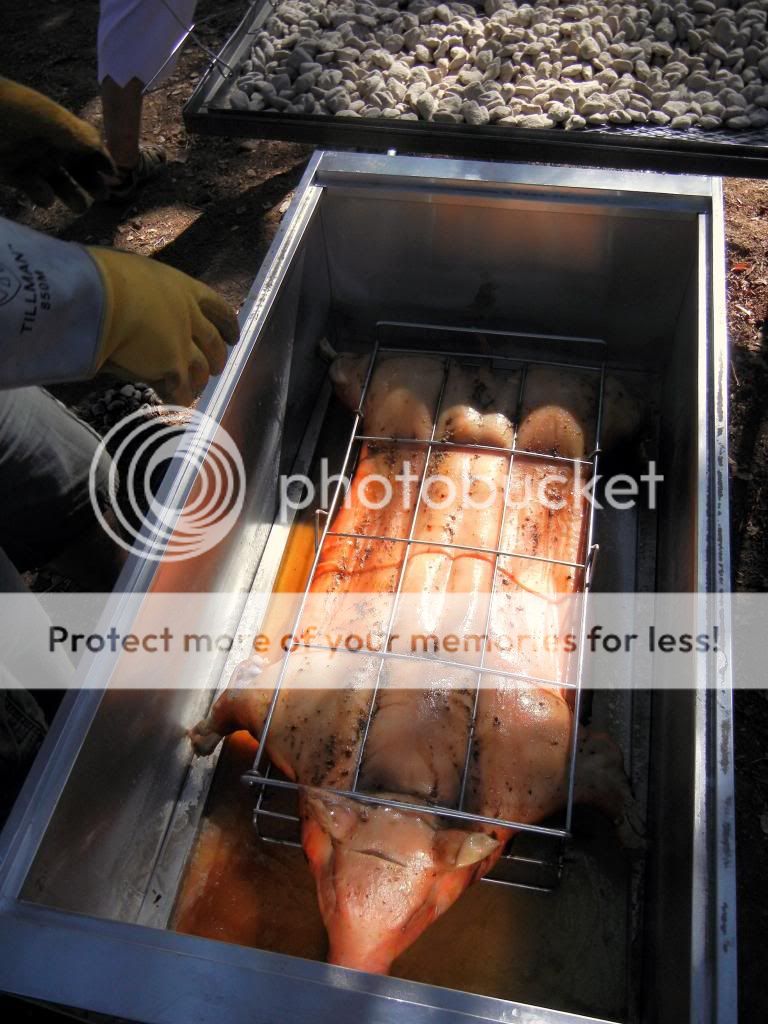
The process begins by locking the pig into the steel frame
that comes with the Caja China that supports the pig above the floor of the
box, prevents it from curling and allows for easy handling and flipping the pig
near the end of the cook.

You then place the pig, in the frame inside the box
and as you can see from the photos, we had to remove the trotters in order to
get it to fit. Otherwise, the 100lb pig fit perfectly. It’s a good idea to make
sure the box is exactly where you want it before doing so, it’s a bit unwieldy to
move once loaded and impossible once the fire is lit.

Once the pig is secure in the box you begin the cooking by
piling 18lbs of charcoal, split into two piles, on the charcoal tray, light it,
wait until the coals ash over and spread them evenly. Once this is done the
clock starts on your cook. There is no reason to open the box during this
portion of the cook. Doing so only allows heat to escape and will slow the
total cooking time. As you can see in the photos, I have a remote temperature transmitter
running into the box and into the center of the rear ham to monitor the temperature
of the meat. This turned out to be overkill, but when cooking for others I’m
always a little extra careful about making sure everything is completely cooked.

Once the cooking had commenced, we added an additional 10lbs
of charcoal after an hour and again 10lbs after the third hour. At this point the
internal temp of the pig should be around the 180-190 degree range. If not,
cook another 30min or so or until that point is reached. If it’s cold out it
may take you a bit longer. It was over 90 degrees when we cooked so everything
happened on time.
 |
| The party had a pirate theme....hence my silly outfit. Arrrgh mateys! |
 |
| The box's handles come in handy for resting the charcoal tray. |
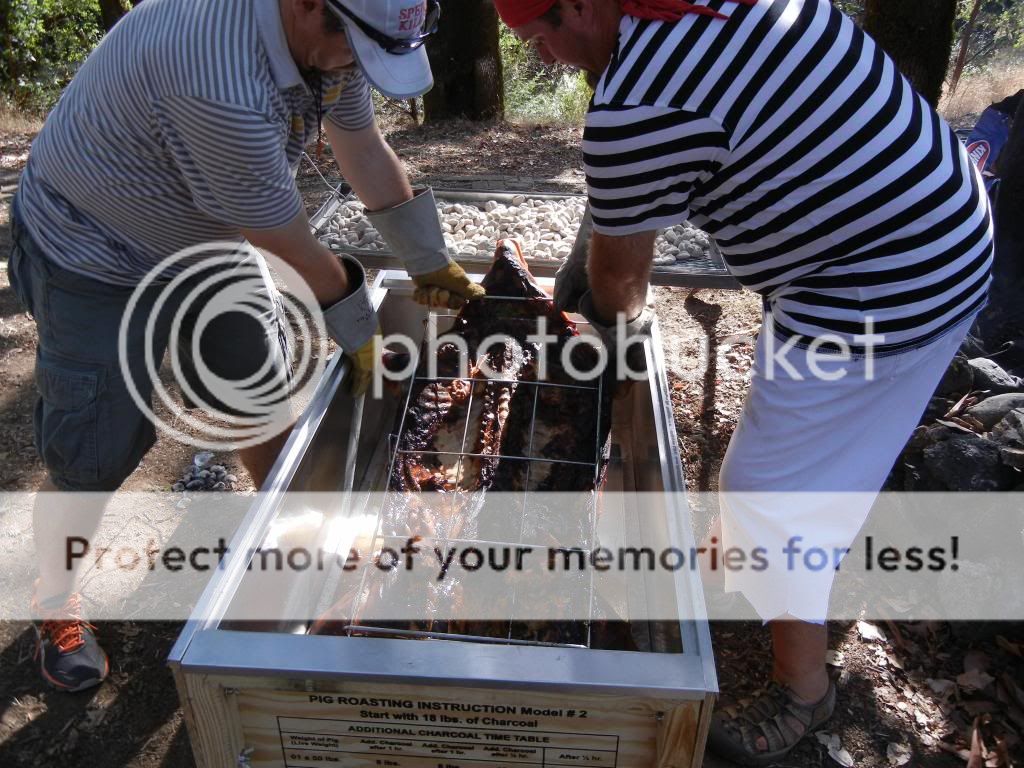
Now the first actual work of the cook begins. You have to
carefully remove the lid and charcoal tray and shake out the excess ash,
discard the ash. Notice the heavy welding gloves we are wearing. Get some. That
tray is crazy hot. Also notice that we are wearing shorts and sandals…..not
recommended. Nobody got burned but if we’d been drinking a little bit more………. The
inside of the cavity of the pig is, as you can see below quite roasted and
awesome looking.

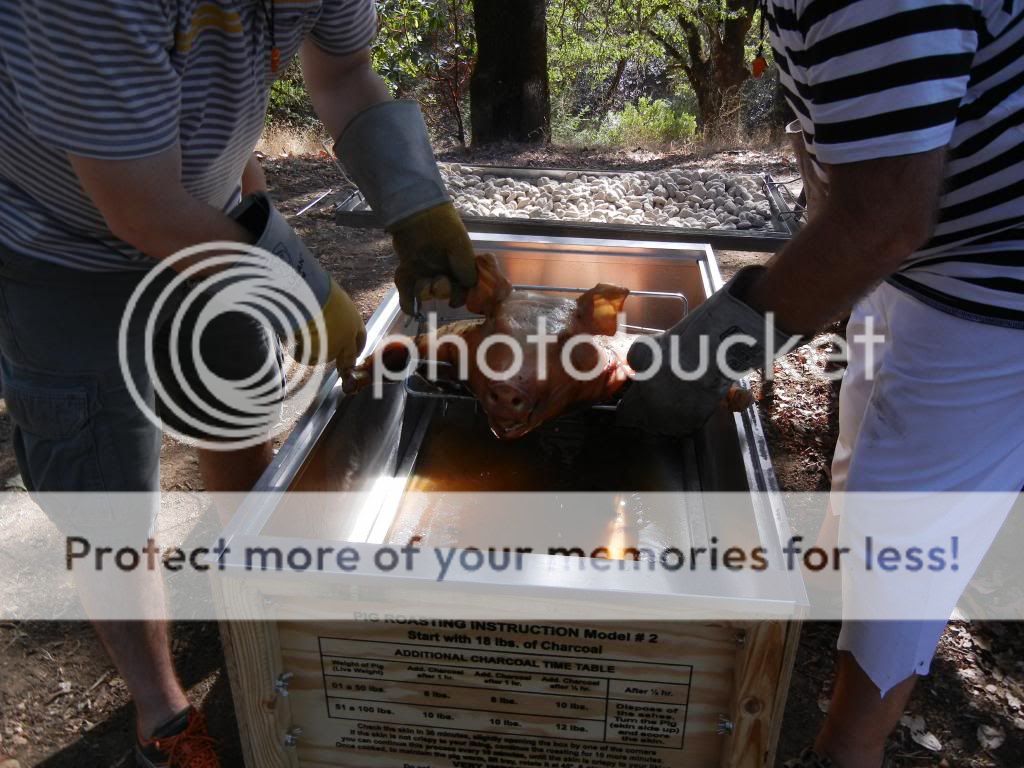
Once the pig is flipped, you’ll notice that the skin is
still pale and decidedly not awesome looking. Don’t worry, it will be. Using a
very sharp knife score the skin in an “X” or grid pattern between each gap in
the wire frame. This allows the fat to render out from beneath the skin
essentially deep frying the skin in the pigs own fat. Read that last sentence again
and if you aren’t hungry, you aren’t human…..

We then placed the lid and charcoal tray back on top of the
box and add another 8lbs of charcoal. The meat is cooked at this point and we
are simply crisping up the skin for the aesthetics and because crispy fried pig
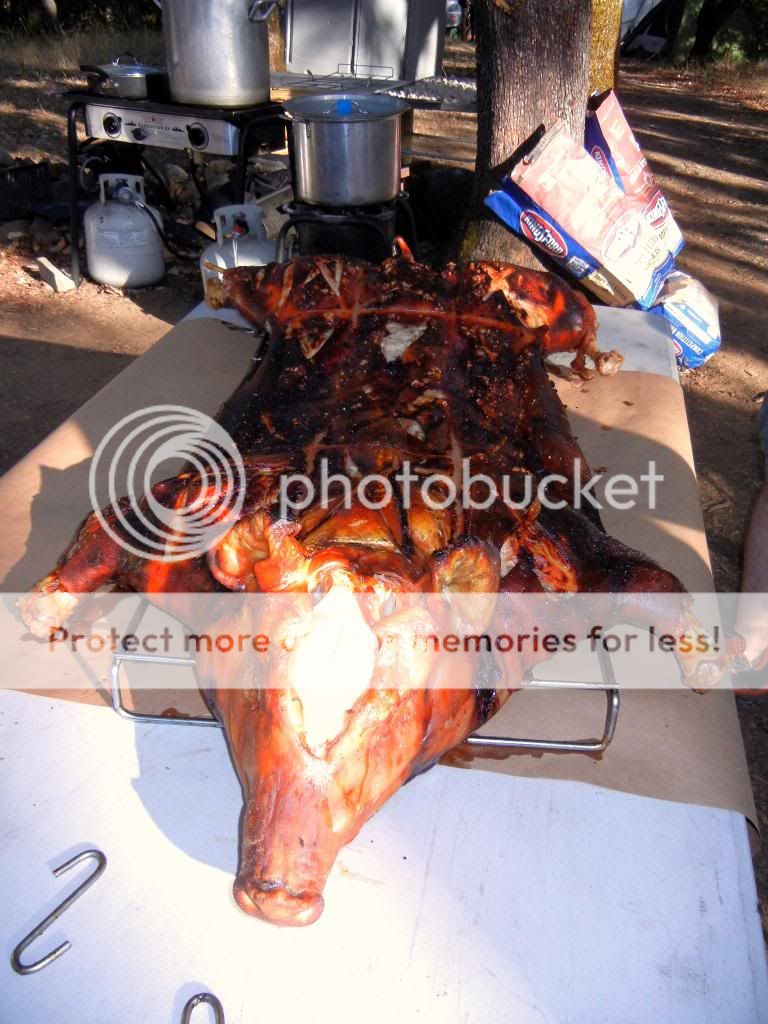
skin is absolutely delicious! During this portion of the cook you’ll want to
lift the lid a bit every 10min or so to check the progress. You are looking for
a uniformly mahogany colored, crisp skin. If one end is done and the other isn’t
you can lift the lid, turn it 90 degrees and place it over the end that isn’t
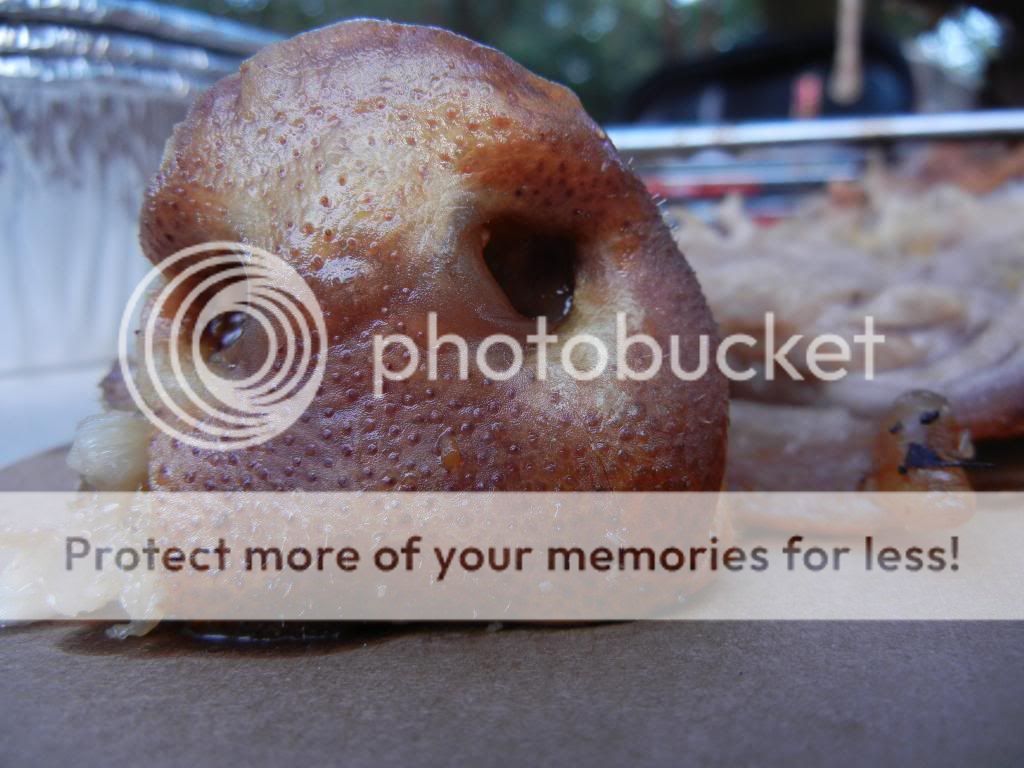
quite there. We had to do this with the head end of the pig. As you can see
below, the head itself didn’t get quite dark enough, but the hams were done and
I didn’t want to overdo it.


All that’s left to do now is to remove the pig from the box
(again, heavy gloves) and remove the top portion of the wire frame.

Breaking
down the pig for serving is very simple. Using a sharp knife remove the hams,
rib sections, loins and backstraps and cut into ~8oz servings. I tried to have
meat with a bit of skin in every serving but kept a bit of the meat aside with
no skin for the people that might be creeped out by eating crispy pig skin. Take
note of who those people are and consider removing them from future invitation
lists.
We served the roast pig with a “New Orleans Style” Red Beans
& Rice and Kathy made an awesome slaw to go with it. Our friends Patty
& Mike contributed a citrus/ginger side sauce as well that a bunch of
people really liked too.
From the lighting of the first match to the time we began
serving was just under 6hrs which is bloody incredible. An Imu cook can take
12-24 hours and before that you have to dig the pit! The end result from the La
Caja China
was absolutely awesome! It was absurdly tender, rich, uniformly moist, not too fatty,
slightly sweet with a bit of the caramelized crisp skin and just a hint of
acidic tang from the mojo sauce. Honestly, it’s one of the best pork meals I’ve
ever had and though I still dearly love the process, ceremony and result of my
Kalua Pig this is MUUUUUCH easier and just as tasty but in a different way.
There wasn't much left except for a few scraps that I brought home for the dogs.
If you have any questions, feel free to leave them in the
comments section.
Cuban Mojo Sauce
1.5c Freshly Squeezed Orange Juice1.5c Freshly Squeezed Lime Juice1.5c Freshly Squeezed Meyer Lemon Juice1/2c Olive Oil1 Whole Onion (chopped as finely as possible, think food processor + 1 ½” chunk)50 Cloves Garlic (chopped as finely as possible, think food processor)4Tbsp Dry Oregano3tsp Salt3tsp Pepper3tsp Ground Cumin
Heat the oil, add garlic & onion and cook on a low flame
until that single ½” chunk of onion is softened, then remove it. Add juices and
spices and simmer for 30min. Put the sauce in a container and chill for at
least 24hrs before use.
When you are ready to inject your pig strain the sauce and
keep the moist solids. If you don’t strain it the solids will clog the
injector. Once all the sauce is injected, mix another 3tsp ea of salt &
pepper with the solids and use that to rub the cavity and outside of the pig.
It was super yummy! Thanks to you and team!
ReplyDelete